You may be searching for alternatives for push notification after the shut down announcement of Parse. The big question is how to migrate the entire device data to other MBaaS providers. ShepHertz has just launched easy data migration steps from Parse to App42 Backend-as-a-Service. In this blog I will specify how to migrate your Push Notification servers from Parse using App42 Management Console AppHQ.Usted podría estar buscando alternativas para notificaciones push desde el anuncio del cierre de Parse. La gran pregunta es cómo migrar todos los datos del dispositivo a otros proveedores MBaaS. Shephertz acaba de lanzar simples pasos para la migración desde Parse a App 42 Backend as a Service. En este blog se especifica como migrar sus servidores de notificaciones push desde Parse usando App42 Management Console AppHQ.
Export-import app data from Parse to ShepHertz
- Open Parse Dashboard
- Go to App Settings and select General option
- Click on Export Data option
- Register\Login with App42 platform
- Create an app with our quick start guide
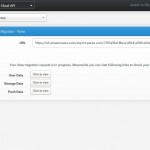
- Select Data Migration option on side navigation in AppHQ as shown below
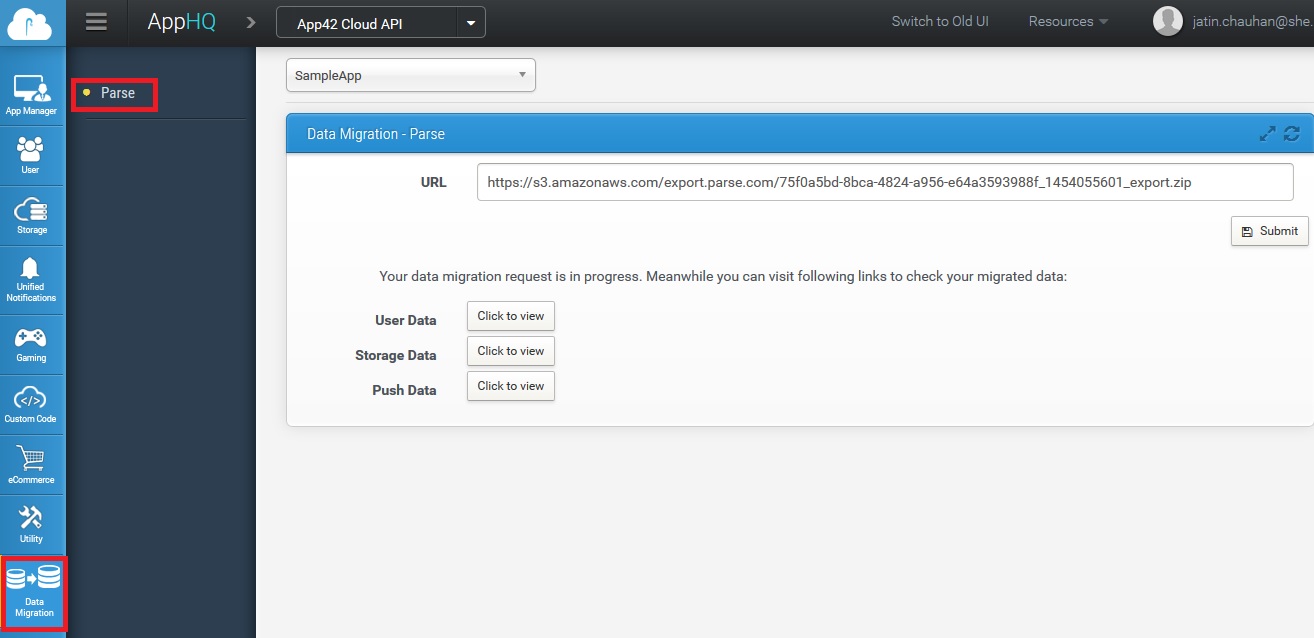
- Submit link URL of data file you export from Parse in step 1
- You will be able to see the entire Parse data on AppHQ dashboard
- Now, your application data is in sync with App42
Once your data starts migrating to the App42 Platform, it will take a few minutes to complete the process. Meanwhile, you can complete your Push Notification settings in AppHQ console -> Unified Notifications -> Settings (iOS, Android, WNS, Windows)
iOS Push Settings: I assume you already have the SSL Certificate and .p12 file with you. If not then you can download the .SSL Certificate(.cer file) by logging in to Apple Developer Account as shown in step 3 of this tutorial. Once you have both the files with you then you have to configure your App42 app for iOS Push Notification as follows:
1. Follow the step 4 of this tutorial to create the PEM version of your p12 file
2. To upload your p12 file to App42 platform, login to AppHQ Management Console -> Select Unified Notification -> Select Settings -> Select app name -> Select iOS
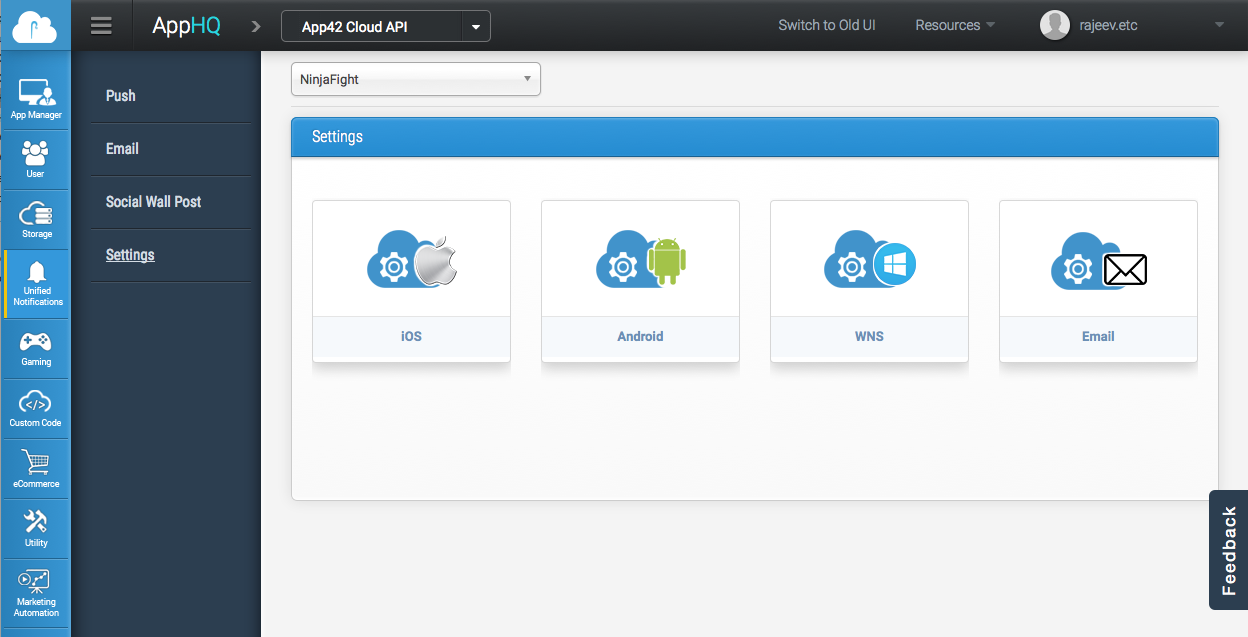 Click on Upload File(.p12) button and browse your p12 file by clicking ‘choose file’ option to upload the file
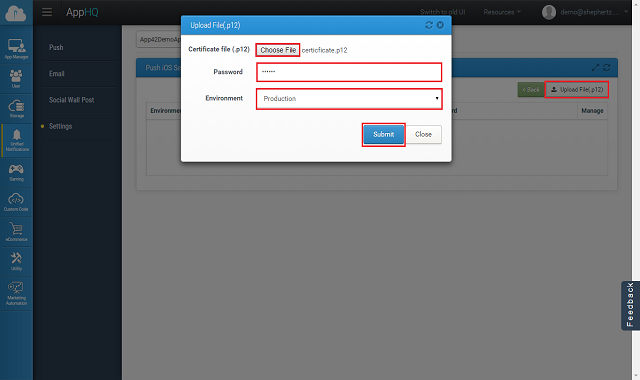
- Enter password that is generated during creation of the p12 file
- Select the environment from the drop down menu
- Click on submit
Repeat the same process to configure App42 app for Push when it is ready for distribution, except selecting production environment from Environment option from the drop down menu.
Android Push Settings: I assume you already have GCM Server Key which you can also take from your parse dashboard as shown below:
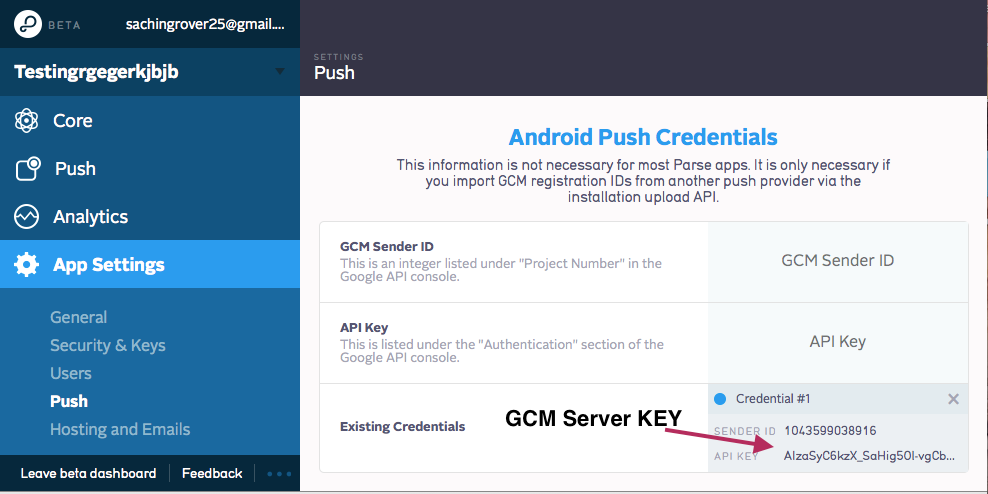
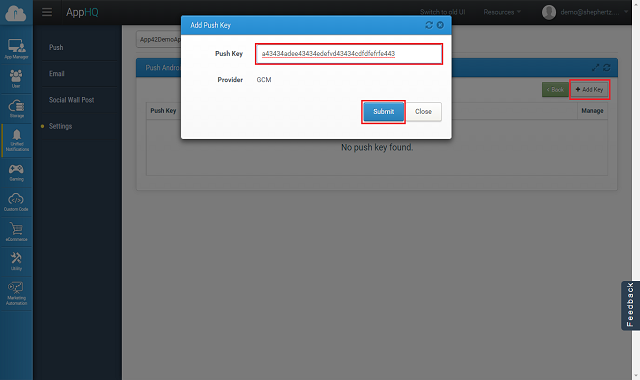
Once you have the key with you then you have to configure your App42 Cloud APIs App for Android Push Notification as follows:
- Login to AppHQ Management Console -> Select Unified Notification -> Select Settings -> Select app name -> Select Android
- Click on Add Key if you have not added yet
- Enter your Server Key under Push Key and press Submit
Windows Push Settings: I assume you already have GCM Server Key which you can also take from your parse dashboard as shown below:
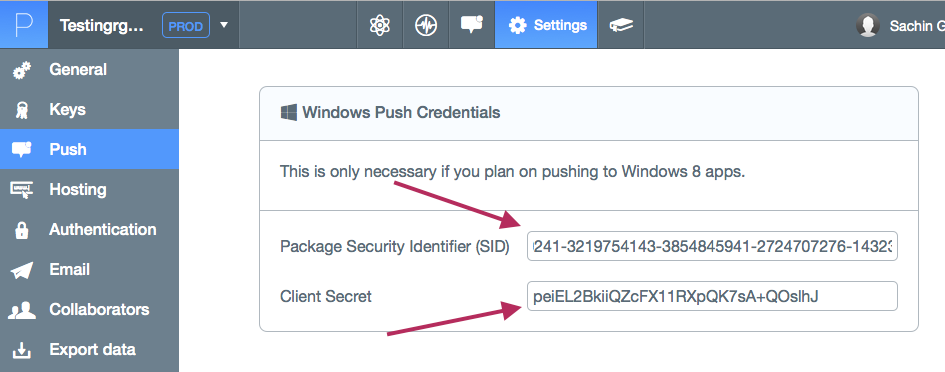
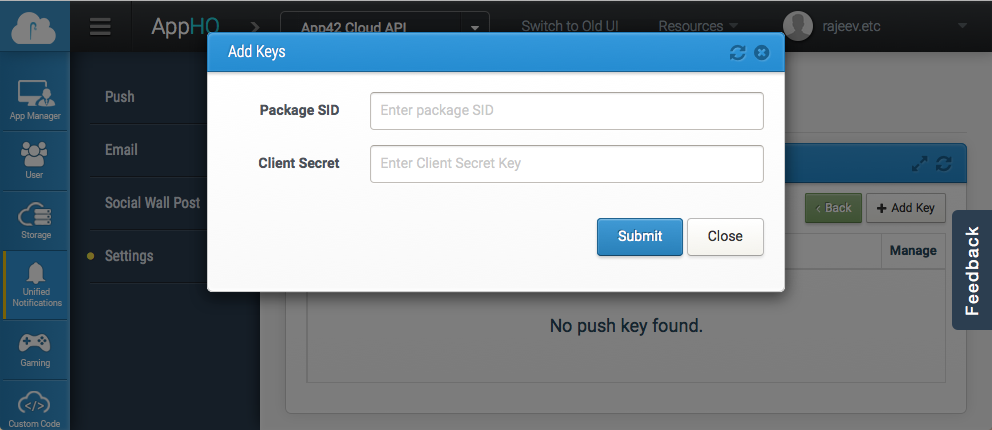
Once you have the key with you then you have to configure your App42 Cloud APIs App for Windows Push Notification as follows:
- Login to AppHQ Management Console -> Select Unified Notification -> Select Settings -> Select app name -> Select Windows
- Click on Add Key if you have not added yet
- Enter your Package SID and Client Secret and press Submit
In case you have any questions or need any further assistance, please feel free to write to us at migration@shephertz.com to talk to our experts
Exporte/Importe datos de la aplicación desde Parse a ShepHertz
- Abra el dashboard Parse
- Vaya a Settings y seleccione la opción General
- Click en la opción Export Data
- Regístrese/Ingrese en la plataforma App42
- Cree una aplicación con nuestra guía rápida
- Seleccione la opción Data Migration al lado del navegador en AppHQ como se muestra a continuación
- Envíe el enlace URL del archivo de datos que exporta de Parse en el paso 1
- Podrá ver todos los datos de Parse en el dashboard de AppHQ
- Ahora, los datos de su aplicación están sincronizados con App42
Una vez sus datos empiecen a migrar a la plataforma App42, tomara algunos minutos para completar el proceso. Mientras tanto, puede completar la configuración de Notificaciones Push en AppHQ console -> Unified Notifications -> Settings (iOS, Android, WNS, Windows)
Configuración iOS Push: Asumo que ya tiene SSL Cetificate y el archivo .p12. Si no lo tiene puede descargar el SSL Cerficate (.cer file) ingresando a Apple Developer Account como se muestra en el paso 3 de este tutorial. Una vez tenga ambos archivos, tiene que configurar su aplicación App42 para notificaciones Push iOS como se muestra a continuación:
1. Siga el paso 4 de este tutorial para crear la versión PEM de su archivo p12.
2. Para subir su archivo p12 a la plataforma, ingrese a AppHQ Management Console -> Select Unified Notification -> Select Settings -> Select app name -> Select iOS
 Click en el botón Upload File (.p12) y navegue en sus archivo p12 dándole click en la opción “choose file” para subir e archivo

- Ingrese la contraseña que se genera durante la creación del archivo p12
- Seleccione el entorno desde el menú desplegable
- Click en Submit
Repita el mismo proceso para configurar la aplicación App42 para Push cuando esté lista para distribución, a excepción.
Configuración Android Push:Asumo que ya tiene GCM Server Key el cual puede tomar desde el dashboard de Parse como se muestra a continuación:

Una vez tenga la clave con usted, configure su App42 Cloud APIs para Notificaciones Push Android como se muestra a continuación:
- Ingrese a AppHQ Management Console -> Select Unified Notification -> Select Settings -> Select app name -> Select Android
- Click en Add Key si todavía no la ha agregado
- Ingrese su Server Key en Push Key y presione Submit

Configuración Windows Push: Asumo que ya tiene GCM Server Key el cual puede tomar desde el dashboard de Parse como se muestra a continuación:

Una vez tenga la clave con usted, configure su App42 Cloud APIs para Notificaciones Push Android como se muestra a continuación:
- Ingrese a AppHQ Management Console -> Select Unified Notification -> Select Settings -> Select app name -> Select Windows
- Click en Add Key si todavía no la ha agregado
- Ingrese su Package SID and Client Secret y presione Submit

En caso que tenga alguna pregunta o necesite de asistencia, por favor escribanos a migration@shephertz.com para hablar con nuestros expertos.


Leave A Reply