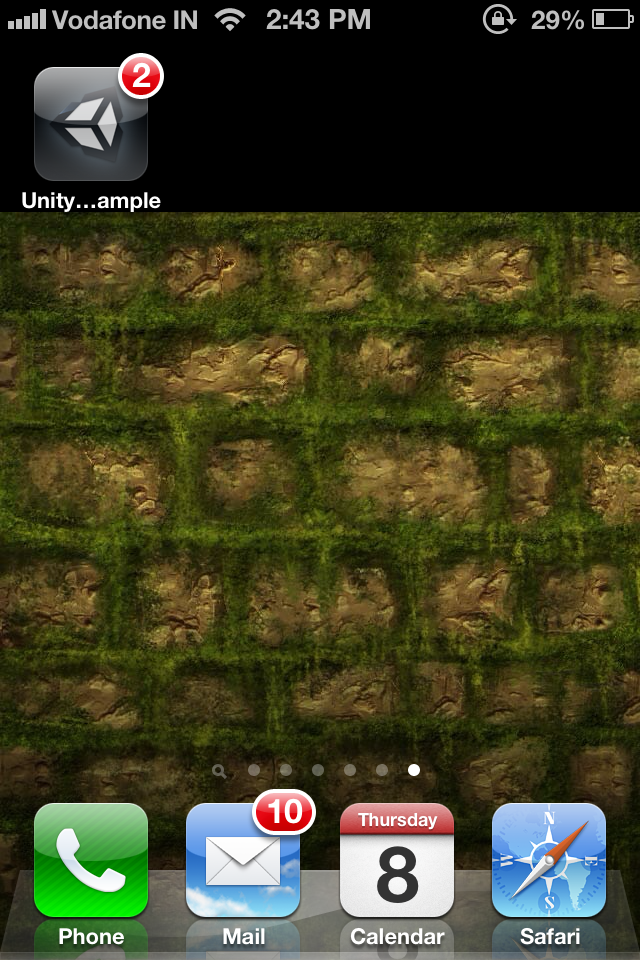
Implementing Push Notifications in Unity Apps/games for iOS is an easy task and will explain the process of doing this through a sample unity demo App. The source code can be downloaded or viewed from our GitHub Repo.

Implementar notificaciones en juegos/aplicaciones Unity para iOS es una tarea sencilla, el proceso para ello se explicará a través de una aplicación Unity demostrativa. El código de fuente puede ser descargado o puede ser visto desde nuestro GitHub Repo.
To configure Push Notifications for iOS Apps/games; the prerequisites are:
- Create a new App ID and provisioning profile for each App that uses push, as well as a SSL certificate for the server. To do this you should have an iOS Developer Program membership on iOS Dev Center.
- Create .p12 file from the SSL certificate which was downloaded in the above step from the iOS Dev Center.
- A Server and this is where App42 Push Service comes into the picture.
Note: If you are new to Push Notifications for iOS or App42 , you can go through my previous blog first.
Now let’s understand how the sample code implements the Push Notifications by examining the key code snippets. Open the folder which you downloaded and go to assets folder and double click PushSample.unity file to open the sample.
To implement Push just drag and drop our “App42PushHandlerInternal.h/.m” classes to “Assets/Plugins/iOS” folder and “PushScript.cs” and PushResponse.cs C# scripts to “Assets” folder. Assign PushScript.cs to a game object; in the demo it was assigned to the Main Camera. So, let’s browse through the PushScript.cs code.
To receive push notifications, the iOS needs to be notified that your App wants to receive push notifications, and “App42PushHandlerInternal.m” class does it by default .
In the PushScript, all the required callbacks are defined and to get it called, set a listener game object as:
[code java]// Use this for initialization
void Start ()
{
setListenerGameObject(this.gameObject.name);
}
As “App42PushHandlerInternal.m” sends a request to register this device for push notification service; the device token is received from Apple Push Service on the successful response. It is available via “onDidRegisterForRemoteNotificationsWithDeviceToken” call back of PushScript.cs.
//Sent when the application successfully registered with Apple Push Notification Service (APNS).
void onDidRegisterForRemoteNotificationsWithDeviceToken(string deviceToken)
{
  if (deviceToken != null && deviceToken.Length!=0)
  {
     registerDeviceTokenToApp42PushNotificationService(deviceToken,"User Name");
  }
}[/code]
Now you need to register this device to App42 Push Notification Service to start sending/receiving push notifications. To do that, just call "registerDeviceTokenToApp42PushNotificationService" method of PushScript.cs from the above call back.
[code java]//Registers a user with the given device token to App42 push notification service
void registerDeviceTokenToApp42PushNotificationService(string devToken,string userName)
{
  ServiceAPI serviceAPI = new ServiceAPI(api_key,secret_key);
  PushNotificationService pushService = serviceAPI.BuildPushNotificationService();
  pushService.StoreDeviceToken(userName,devToken,"iOS",callBack);
}[/code]
The SendPushToUser method of this script that can be written/called wherever it's required to send a request to App42 server to send a Push Notification to a specific user.
[code java]//Sends push to a given user
void SendPushToUser(string userName,string message)
{
  ServiceAPI serviceAPI = new ServiceAPI(api_key,secret_key);
  PushNotificationService pushService = serviceAPI.BuildPushNotificationService();
  pushService.SendPushMessageToUser(userName,message,callBack);
}[/code]
The "onPushNotificationsReceived" call back of the PushScript will be called when you receive a push notification.
[code java]//Sent when the application Receives a push notification
void onPushNotificationsReceived(string pushMessageString)
{
  Console.WriteLine("onPushNotificationsReceived");
  //dump you code here to handle the pushMessageString
  Debug.Log(pushMessageString);
}[/code]
Now your App has been successfully set up to receive/send push notifications through our App42 Server using App42 Push Notification Service.

If you have any questions or need any further assistance to integrate this in your App, please feel free to write us at support@shephertz.com

Para configurar notificaciones en juegos/aplicaciones de iOS, los prerrequisitos son los siguientes:
- Crear una nueva ID de la aplicación y proveer de un perfil para cada una de las aplicaciones que usen notificaciones, también un certificado SSL para el servidor. Para hacer esto debe tener una membresía iOS Developer Program en iOS Dev Center.
- Crear un archivo p12 desde un certificado SSL el cual en el fue descargado en el paso anterior desde iOS Dev Center.
- Un servidor, aquí es donde App42 Push Service entra en juego
// Use this for initialization
void Start ()
{
  setListenerGameObject(this.gameObject.name);
}
“App42PushHandlerInternal.m” enviará una solicitud para registrar este dispositivo para el servicio de notificaciones; el token del dispositivo es recibido desde Apple Push Service con una respuesta positiva. Esta se encuentra disponible vía “onDidRegisterForRemoteNotificationsWithDeviceToken” llamada de PushScrpt.cs
//Sent when the application successfully registered with Apple Push Notification Service (APNS).
void onDidRegisterForRemoteNotificationsWithDeviceToken(string deviceToken)
{
  if (deviceToken != null && deviceToken.Length!=0)
  {
     registerDeviceTokenToApp42PushNotificationService(deviceToken,"User Name");
  }
}
Ahora necesita registrar este dispositivo a App42 Push Notification Service para empezar a enviar/recibir notificaciones. Para hacer esto, solo llame el “registerDeviceTokenToApp42PushNotificationService” método de PushScript.cs desde la llamada de abajo
//Registers a user with the given device token to APP42 push notification service
void registerDeviceTokenToApp42PushNotificationService(string devToken,string userName)
{
  ServiceAPI serviceAPI = new ServiceAPI(api_key,secret_key);
  PushNotificationService pushService = serviceAPI.BuildPushNotificationService();
  pushService.StoreDeviceToken(userName,devToken,"iOS",callBack);
}
El método SendPushToUser de este script puede ser escrito/llamado donde sea requerido para enviar una solicitud al servidor App42 para enviar una notificación a un usuario en específico.
//Sends push to a given user
void SendPushToUser(string userName,string message)
{
  ServiceAPI serviceAPI = new ServiceAPI(api_key,secret_key);
  PushNotificationService pushService = serviceAPI.BuildPushNotificationService();
  pushService.SendPushMessageToUser(userName,message,callBack);
}
El llamado “onPushNotificationsReceived” del PushScript será llamado cuando reciba una notificación.
//Sent when the application Receives a push notification
void onPushNotificationsReceived(string pushMessageString)
{
  Console.WriteLine("onPushNotificationsReceived");
  //dump you code here to handle the pushMessageString
  Debug.Log(pushMessageString);
}
Ahora su aplicación ha sido exitosamente instalada para recibir/mandar notificaciones a través de nuestro servidor App42 usando App42 Push Notification Service.
Si tiene alguna pregunta o más adelante necesita asistencia para integrar algo a su aplicación, escribanos por favor a support@shephertz.com


Comment
Hi Rajeev, I would like to know what is the license on App42 server.
I’m interested in implementing this service in our game. but, I need license info so that I can take this decision.
Thanks,