It is reasonably an easy task to integrate Push Notifications in Android application using App42. Our platform uses GCM (Google Cloud Messaging) and NokiaX Push API to send messages on android devices. You can use it in both devices and also publish it on Google and NokiaX play store. You do not need separate integration for GCM or NokiaX for a single application. App42 Cloud API provides Push service for any Android Mobile App to increase user engagement. Not only you can send push messages from UI console but also schedule these to your app users. Along with this, App42 also gives you an interesting insight about analytic of push messages.
1. Prerequisite Setup
- Register with App42 Platform
- Create an App, once you are on Quick-start page after registration
- If you are already registered, login to AppHQ console & create an App from App Manager -> App Create link
- Download sample project from our GitHub Repo
- Unzip the downloaded file and import it in eclipse
- Open MainActivty.java file in and pass required information in onCreate method as shown below (application keys for AppHq console).
App42API.initialize(this,"App42 API key","App42 Secretkey");
App42API.setLoggedInUser("Your UserId to Push registration");
2. GCM based Push Integration
- Create a project and get your Project No from Google developer Console. It would be available in *Overview* section of your project
- Select your created project and click on *APIs* option in Google developer console and enable Google Cloud Messaging for Android service

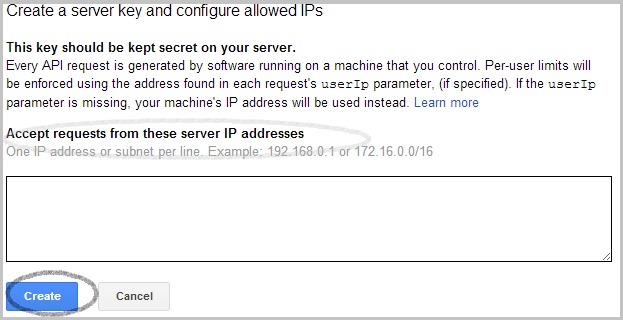
- Click on *Credentials* from left menu -> Create New Key -> Server Key.

- Keep *Accept requests from the server IP addresses* as blank and click on *Create* button

- From AppHQ console click on Push Notifications and select Android Settings in Settings option
- Select GCM as your app and provider, copy server key that is generated in Google developer console in the step mentioned above and submit it

- Open CommonUtilities.java file and place your Google Project No. generated in previous step
private static final String GcmProjectNo = ""
3. NokiaX based Push Integration
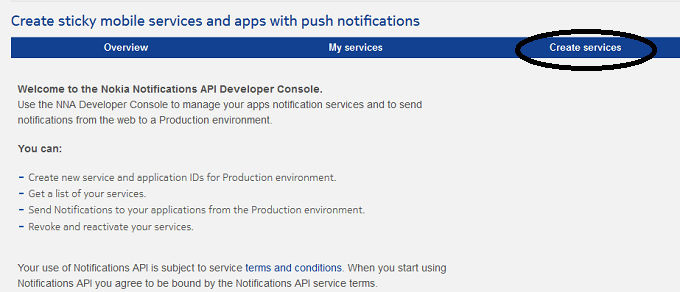
- Open Nokia developer console. Login with your credentials or register, if you do not have an account

- Click on Create services button on right side

- Fill the information to create NokiaX service and click on Create button

- Now you will get your Authorization key of NokiaX service

- From AppHQ console, click on Push Notification and select Android Settings in Settings option
- Select your app and provider as NokiaX, copy Authorization key that is generated in the step mentioned above (please copy value of the key and not copy ‘key=’ text in that key)

- Open CommonUtilities.java file and place your Nokia SenderId generated from in previous step
private static final String NokiaXSenderId = "";
4. Start Building
- Build your Android App and run it
- For further design details Read this
- In This Blog we have explain how easily you can integrate GCM as well as Nokia X Push Notification in a single Android application using our platform.
If you have queries or need any further assistance, please feel free to reach us at support@shephertz.com


Leave A Reply