App42 PaaS is a Polyglot App-Hosting Platform which lets you stay away from all server-side hassles. It allows you to concentrate on your application to deliver maximum value to end users.
Here is a quick walk-through to App42 Command Line for creating a new infrastructure and deploying your application on App42 PaaS.
To start right off, you need an App42 PaaS Account and App42 Client. If you haven’t already, I recommend you to create your free account from here. Once you Sign-up, you can receive your API Key and Secret Key on App42 PaaS Dashboard as shown below.

Make sure you have installed App42 Client. App42 command line tool is distributed as a RubyGem. To install App42 Client, run below command in prompt.
$ gem install app42
To access App42 PaaS – App Hosting Platform, add the API key and Secret key from your console by using this command:

At this point your credentials have been authorized from the server and stored in your local file system.
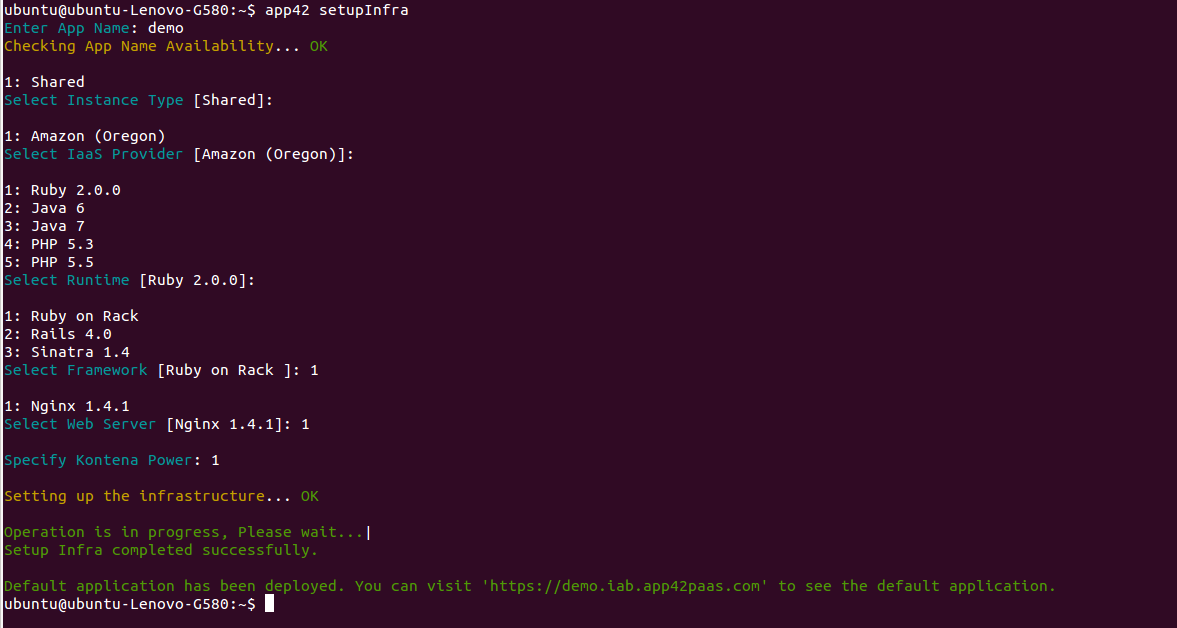
Now to deploy your application on App42 PaaS, You first need to setup an environment by providing certain inputs which will run your App.

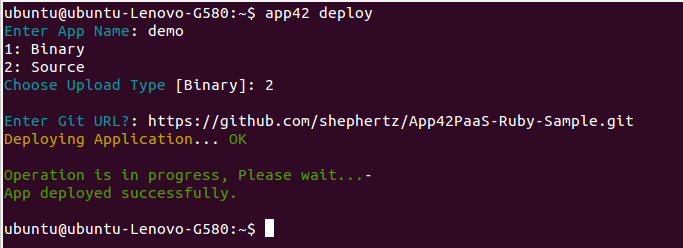
You are now ready to deploy your application on App42 PaaS platform. That can be done by using the GIT URL or creating a binary (including all dependencies) on your local development environment. Here we are going to deploy your application by providing your public Git Repository URL.

And you’re done! You have successfully deployed your Application on App42 PaaS Platform. You can now visit your new DEMO App at http://demo.iab.app42paas.com (or any other URL you choose).
That’s all for now. You can learn more about App42 commands by running app42 help or by visiting App42 Client Usage.


Leave A Reply