App42 PaaS provides a simple and easy way to migrate your existing data on App42 PaaS. It provides you with dual options of having direct access and easy control of your database using App42 PaaS’s interactive console as well as through Command Line Tool (CLI). One can easily manage the data using these features.
In this post, I will guide you on how to migrate your existing MySQL database to App42 PaaS MySQL service using App42 PaaS Management Console as well App42 Client (a command line tool).
Prerequisites :
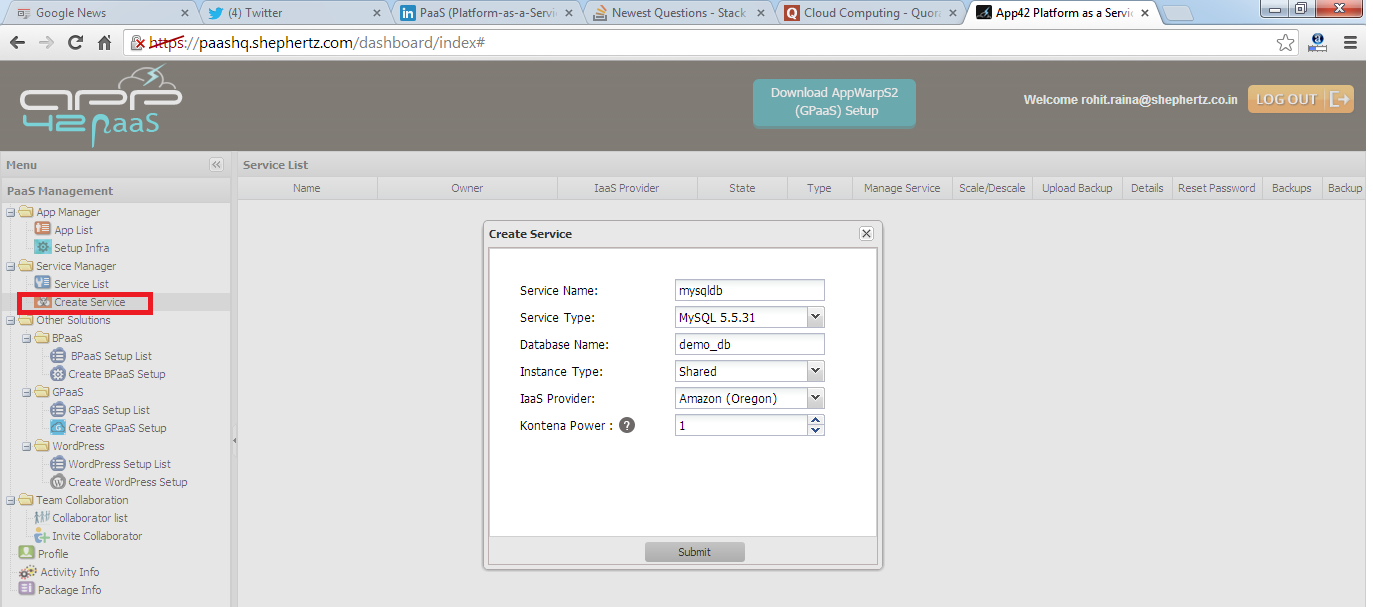
Creating MySQL Service on App42 PaaS:
To create MySQL Service, you have to run the ‘app42 createService‘ command and choose MySQL service from the service options and database name as in your existing SQL data, and other relevant options to get your service ready.
Using App42 PaaS Client –
Using App42 PaaS HQ Console-
You have successfully created your MySQL service on App42 PaaS platform.
Restoring existing SQL Data to App42 PaaS MySQL service :
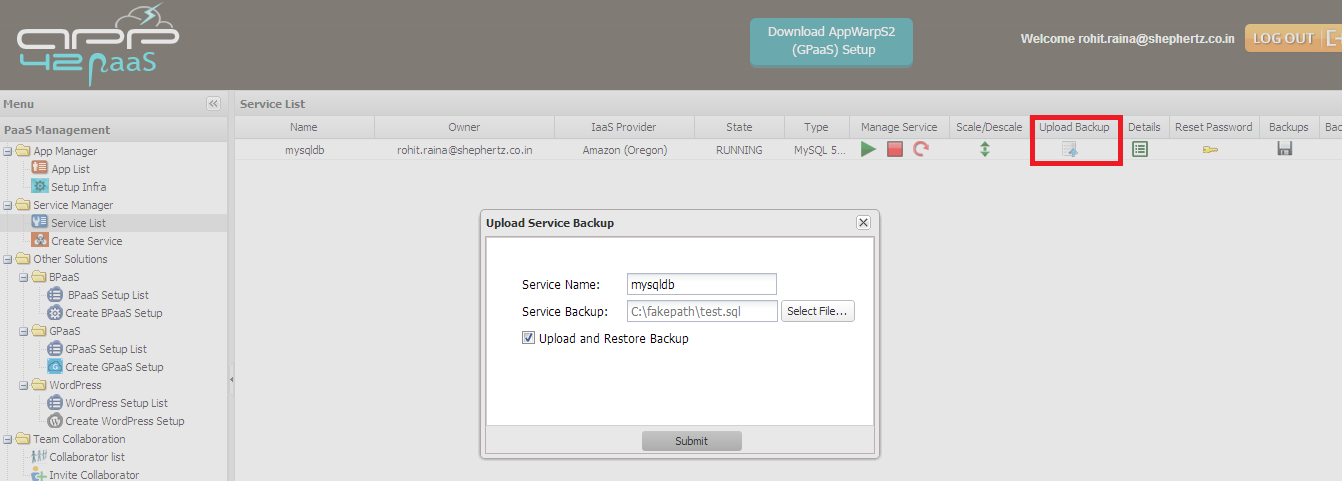
Now you have to upload your existing SQL data to App42 PaaS server and check the “restore” option to restore it on the created App42 PaaS MySQL service. App42 PaaS supports “.sql, .zip, .tar.gz, .dump, .gzip, .rdb” file extensions. You can use any of these to upload your existing SQL data on App42 PaaS service.
Run the ‘app42 uploadBackup‘ command and choose the relevant options to get your existing SQL data restored.
Using App42 PaaS Client –
Using App42 PaaS HQ Console-
You have successfully uploaded and restored existing SQL Data to App42 PaaS MySQL service.
To learn more about App42 PaaS services and how to get service info, visit App42 PaaS Dev Center. To know how to access your service from outside the App42 PaaS platform, click here.
Visit App42 PaaS Dev Center for more tutorials and samples. If you have any queries or require further assistance, please feel free to reach us at support@shephertz.com.


Leave A Reply