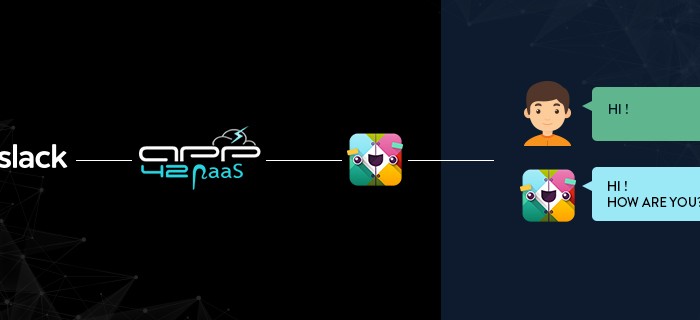
Backend Platform as a Service (BPaaS) is a backend solution running on App42 PaaS Platform. It is truly commendable of App42 to provide such dedicated BaaS solutions to the ever growing industry of developers.
Why to create BPaaS when App42 already provides BaaS solution?
The major objective of App42 is to make an app developer successful on the cloud and for that it has come up with innovative ways to offer easy yet competitive keys to its customers. This will enable the developers to create Apps with much ease in terms of time and effort. Given the case, App42 takes a higher jump in making all its app developers efficacious.
BPaaS comes as a feasible solution for those, who have a backend requirement and expect their apps to have a huge traffic. It will not only get you the complete backend hosting on App42 PaaS but also the access to multiple APIs like User Management, Social Leaderboard, Avatar Management, Buddy Management, NoSQL Storage, File Storage etc.
How BPaaS works?
BPaaS is built with an aim to let users have their own dedicated App42 Cloud API solution. If, you do not want your application to share the bandwidth with another application, or you are too keen to have your individual database, BPaaS is your savior.
BPaaS mainly includes:
- Two Servers, One for the App42 Cloud API Server and the Other for the Dashboard(AppHQ Console)
- One RDBMS i.e MySQL and one NoSQL i.e, MongoDB
How To Get Started with BPaaS on App42 PaaS?
Prerequisites:
How to Set up an Infrastructure for BPaaS:
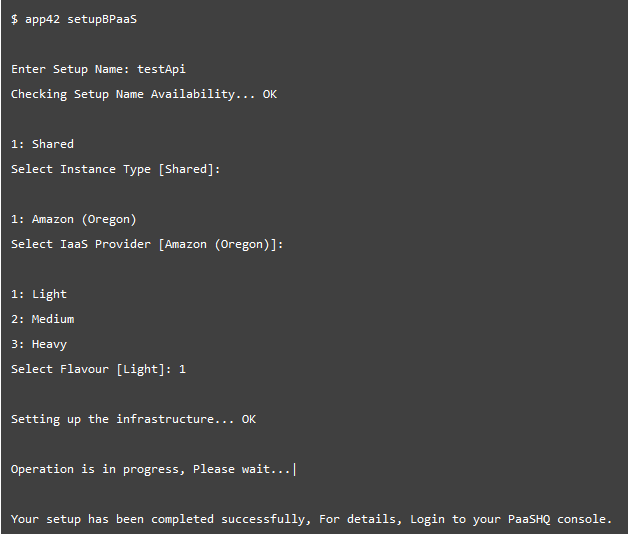
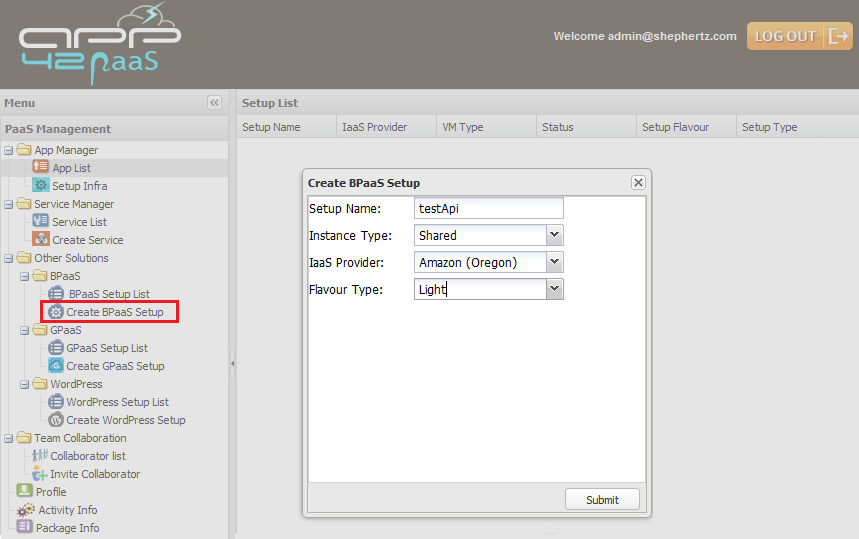
To setup an infrastructure for your BPaaS application, you have to run the ‘app42 setupBPaaS‘ command using App42 PaaS Client. For this, choose from the relevant options to set the infrastructure or directly click on ‘Create BPaaS Setup’ under ‘Other Solutions’ on the left panel of App42 PaaS HQ Console. Fill in the details to create your BPaaS setup.
Using App42 PaaS Client –

Using App42 PaaS HQ Console-

You have successfully setup your BPaaS environment on App42 PaaS platform.
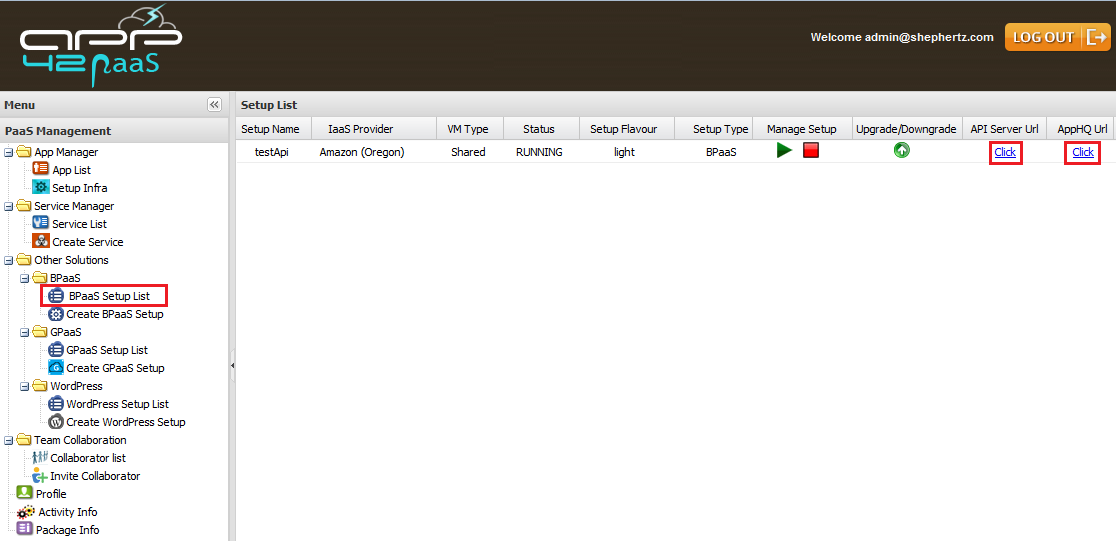
Now, go to ‘BPaaS Setup List’ under ‘Other Solutions’ on the left panel to see the Setup List.

Click on the ‘AppHQ Url‘ from the list to open AppHQ Dashboard. You can effectively use this dashboard to manage your Backend Data. Use the ‘API Server Url‘ in your SDKs to connect to the API Server.
Set up Cloud API SDKs?
You can download the SDKs from either App42 PaaS – BPaaS or App42 Backend APIs. Below is the sample code to create user using User Management API.
// import packages
import com.shephertz.app42.paas.sdk.java.ServiceAPI;
import com.shephertz.app42.paas.sdk.java.App42Exception;
import com.shephertz.app42.paas.sdk.java.user.User;
import com.shephertz.app42.paas.sdk.java.user.UserService;

// initialize
ServiceAPI api = new ServiceAPI("API_KEY","SECRET_KEY");
api.setBaseURL("YOUR_API_SERVER_URL");
// e.g api.setBaseURL("https://testapicloudapi.iab.app42paas.com");

// Build User Service
UserService userService = api.buildUserService();

// create User
String userName = "Nick";
String pwd = "********";
String emailId = "nick@shephertz.co.in";

try {
  User user = userService.createUser(userName, pwd, emailId);
} catch(App42Exception exception) {
    int appErrorCode = exception.getAppErrorCode();
    int httpErrorCode = exception.getHttpErrorCode();
    if(appErrorCode == 2001){
      // Handle here for Bad Request
      // The request parameters are invalid.
      // Username 'Nick' already exists.
    } else if(appErrorCode  == 2005){
      // Handle here for Bad Request
      // The request parameters are invalid.
      // User with emailId 'nick@shephertz.co.in' already exists.)
    } else if(appErrorCode == 1401){
      // handle here for Client is not authorized
    }else if(appErrorCode == 1500){
      // handle here for Internal Server Error
    }
    String jsonText = exception.getMessage();
}
In this blog, we have talked about BPaaS and how to get started with it. In addition to this, you can also visit App42 Cloud API for further reference.
For more doubts and questions, do write to us at support@shephertz.com


Leave A Reply