There are numerous tutorials on configuring Push Notifications through App42 Backend APIs. Following is a complete tutorial on sending Push Notification through App42 UI console AppHQ. It elucidates the process of configuration and sending Push Notifications. How can you use JSON tags to add different attributes to a Push Notification? Some of the best use cases are redirecting the user to a specific page in your app, link (i.e. a blog) when user taps on the notification, playing a sound and many more.
Register / Login to AppHQ Console
– Open AppHQ and Click on Log In With Shephertz Account button to login if, you are already registered to AppHQ or you can register to AppHQ by clicking on Sign Up button
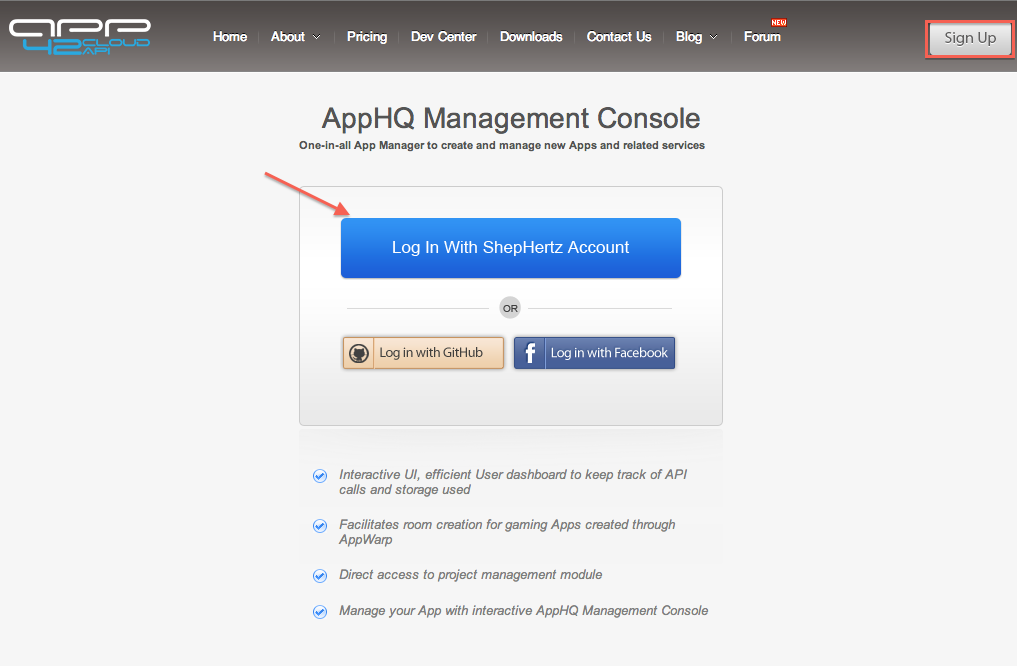
– You can also login to AppHQ using your GitHub or Facebook account credentials
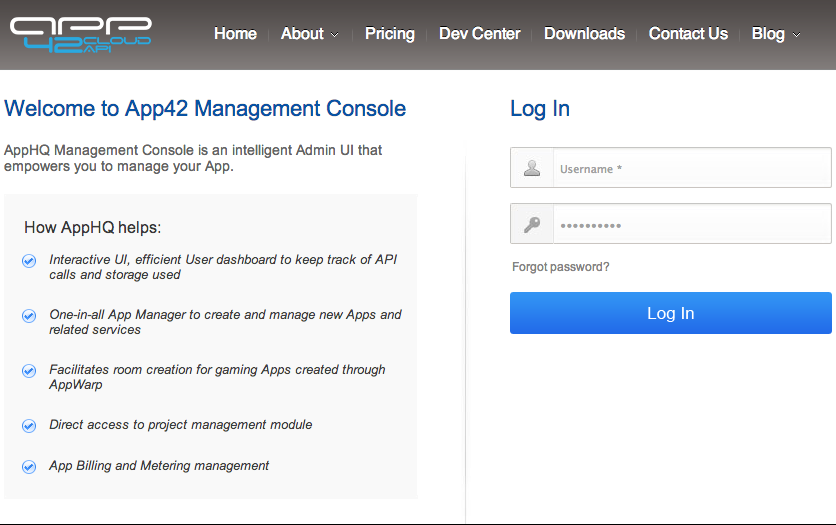
-Enter your username and password and Click on Log In button in the presented screen
Create an App on App42 Platform
– To create an App on App42 platform navigate to AppHQ Menu to the left-hand-side panel -> Select App Manager -> Select Create App under App Manager
– Select AppType by clicking on the radio button under App42-Create App on right-hand-side panel as shown below
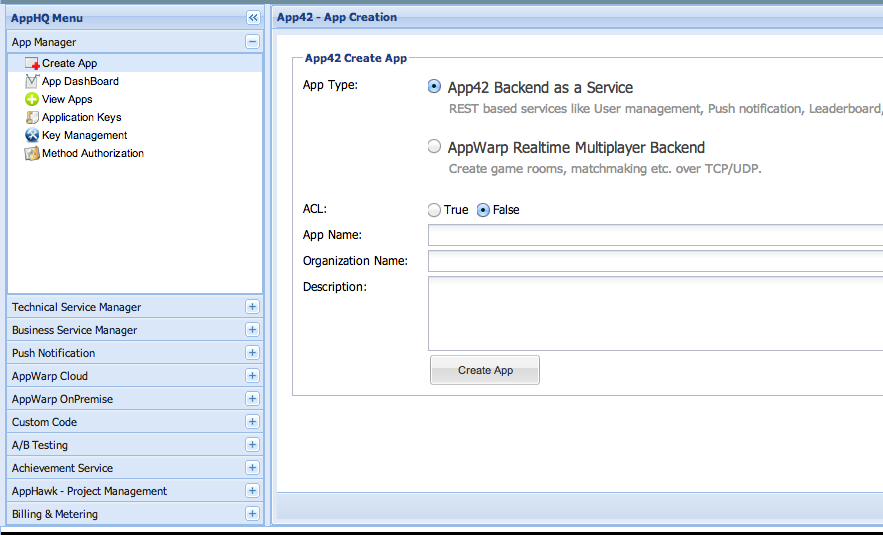
Note: Select App42 Backend as a Service if you want to use App42 Cloud API and select AppWarp Real Time Multiplayer Backend when you are here for Real Time Multiplayer gaming backend support.
– Enter the App details like App Name, Organisation Name and Description of the App you want to create
– Click on the Create App and you are done, your app is created on App42 platform
Configure Your App on APP42 Platform for Push Notification
1. Click on PushNotification under AppHQ Menu on the left-side menu panel
2. Select iOS Settings under Settings
3. Select your App Name from the drop-down under Push Notification Settings on right- side panel
4. Click on Choose File to browse your .p12 file from your local system, enter password needed to open the .p12 file and then select the environment (Development/ Production) from the drop-down menu
5. Click on Submit button to save the Settings for Push Notification on iOS platform. You can refer to the screenshot put forth for more clarity
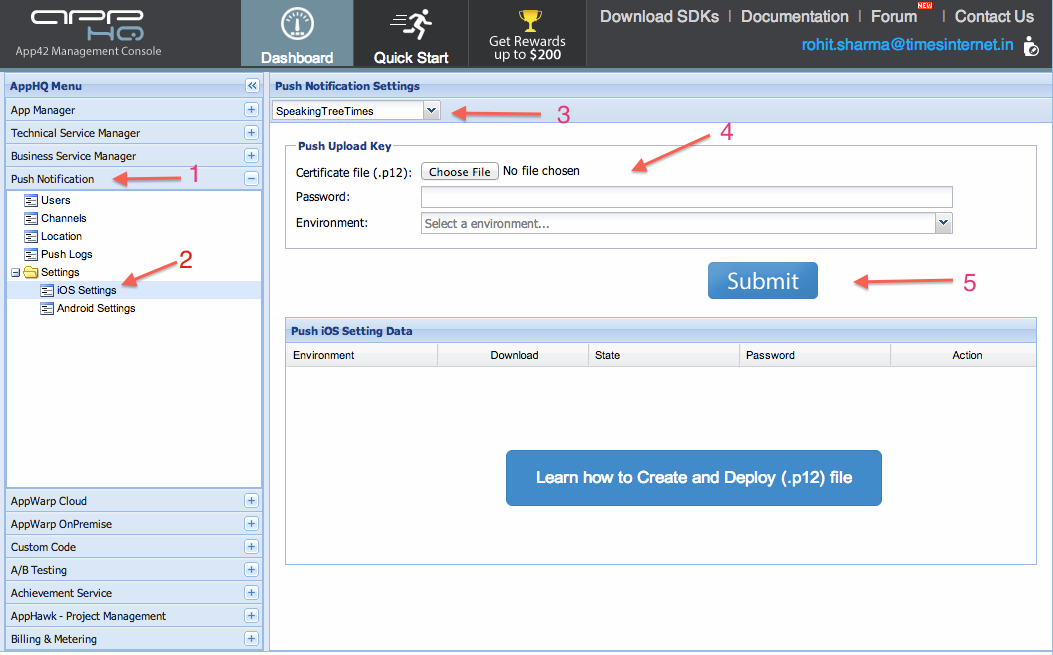
Note: Environment drop-down menu has two options, development and production. You can upload two .p12 files, one for each environment. But, we recommend you to have only one active push profile at a time.
Send Push From App42 Dashboard
To send push notification to a specific user, the user’s device Token needs to be stored to the AppHQ console. That can be done from the App using storeDeviceToken API.
Follow the steps to send a Push Notification.
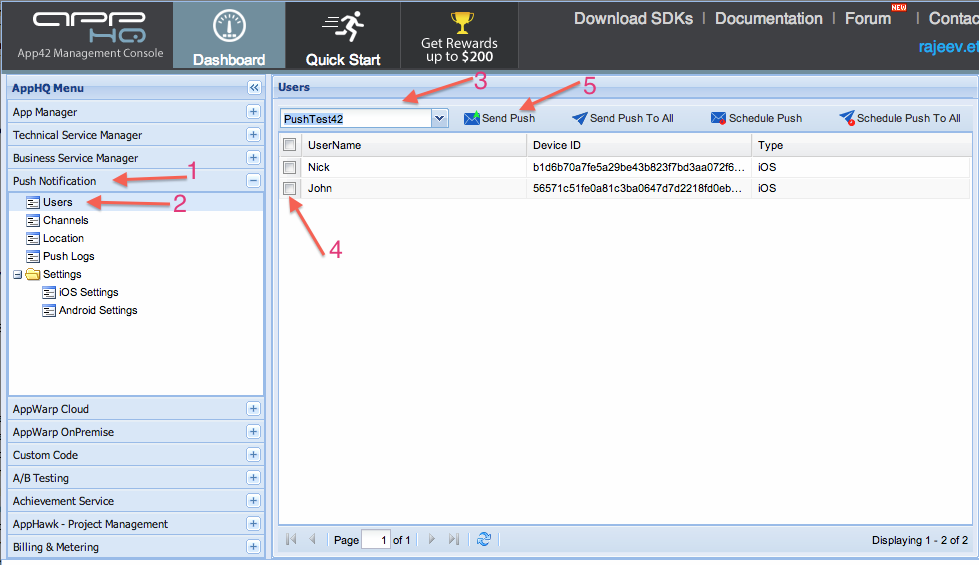
1. Click on Push Notification under AppHQ Menu on the left-side menu panel
2. Select Users under Push Notification
3. Select your App Name from the drop-down under Users on right-side panel
4. Select a UserName from the list by clicking on the square box just before the UserName to who you want to send the push notification
5. Click on the Send Push button to send the Push Notification to the selected user
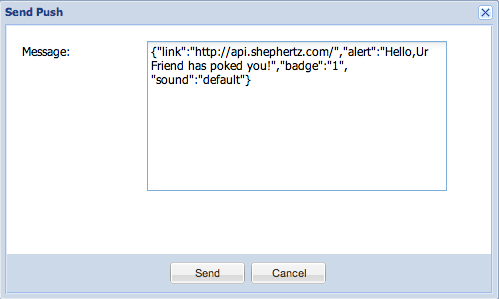
– Enter your message in the box provided, after clicking on Send Push Button
– A message can be a Simple text. For example: Hi… , or can be a valid JSON String for example:
{"blogId":"http://blogs.shephertz.com/","alert":"Hello,Ur Friend has poked you!","badge":"1","sound":"default"}
Here, the string has 4 key-value pair and the value of an alert key will be shown as Push Message in the Push Alert on the device.
– Now, click on the Send Button. The App42 sends this message to APNS and APNS sends this push message to a selected User
If you want to send some custom fields other than alert, badge or sound, you can add them to JSON string as a key value pair. For example:
Case 1: If you want to open a blog for which the URL is coming via Push? The push message should contain the blog URL as discussed.
{"blogId":"http://blogs.shephertz.com",
"alert":"Hello,Ur Friend has poked you!",
"badge":"1",
"sound":"default"}
The message JSON should contain the URL in a key-value pair. As I told you before JSON, the key “blogId” has the URL as its value. When you receive push on the device you need to access the value of this “blogId” key and make a request to fetch data from this URL and then you can show it on a WebView.
Case 2: If a user comments on the blog, push can be sent to an author from the App itself as follows:
NSMutableDictionary *dictionary = [NSMutableDictionary dictionary];
[dictionary setObject:message forKey:@"alert"];
[dictionary setObject:@"default" forKey:@"sound"];
[dictionary setObject:@"1" forKey:@"badge"];
[dictionary setObject:@"http://blogs.shephertz.com/" forKey:@"blogId"];
[dictionary setObject:@"Name of the User who wrote the comment" forKey:@"userName"];
PushNotification *push = [pushObj sendPushMessageToUser:userName withMessageDictionary:dictionary];
Similarly, you can add other keys and values as per the app requirement.
Push Notification Channels
App42 Push notification enables you to create different set of groups called channels. Your app users can subscribe to a channel for which they want to receive a push notification. You can send a message to a channel, which will be delivered to all the users who are subscribed to that channel. This channel can be created from AppHQ console as well as from the App.
Creating Channels:
To create it from AppHQ console:
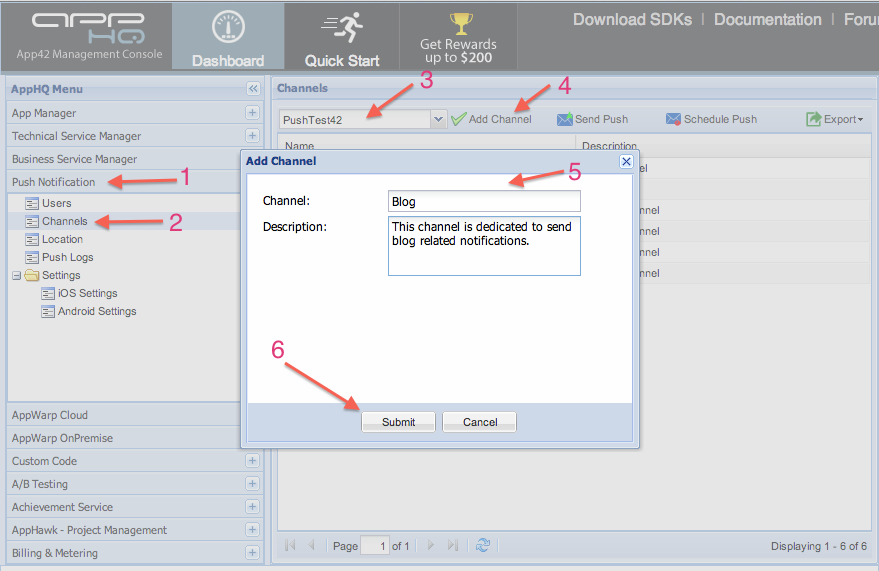
1. Click on Push Notification under AppHQ Menu on the left-side menu panel
2. Select Channels under Push Notification
3. Select your App Name from the drop-down under Channels on right-side panel
4. Click on Add Channel
5. Provide a Channel name and Description in the presented dialog box
6. Click on Submit to create the channel
Sending Push notification to Channels:
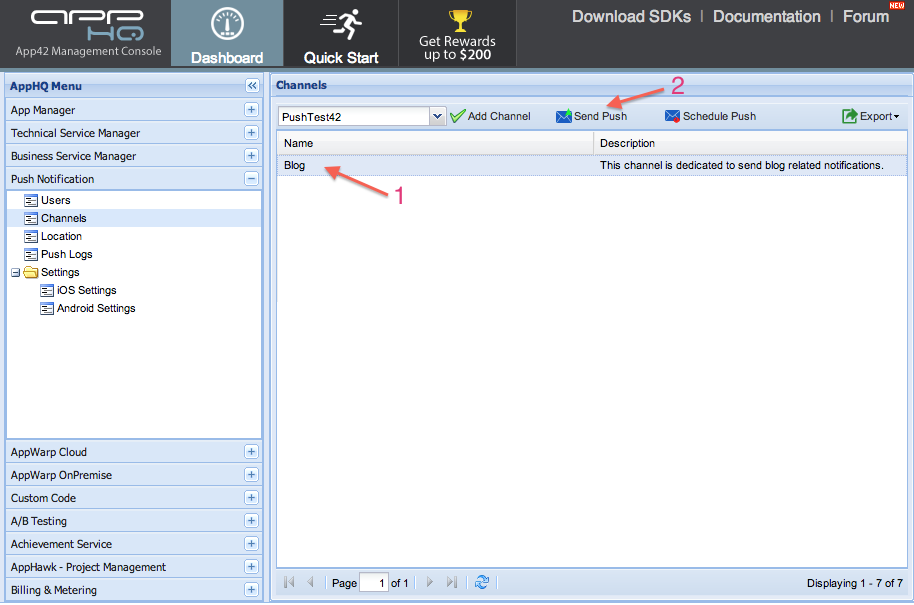
1. Select the channel name from the list of channels
2. Click on Send Push
If you have queries or need any further assistance, please feel free to reach us at support@shephertz.com



Leave A Reply